

A return rate test, also called a leak-off or return flow test, measures how much fuel each injector sends back to the tank instead of burning it. It’s the fastest on-vehicle way to catch an internally leaking common-rail injector, even when a scan tool shows zero fault codes. Run it when you’re chasing hard starts, a rough or uneven idle, unexplained white or blue smoke, or fuel mileage that’s dropped for no obvious reason.
TL;DR:
Return flow readings above 30 mL per minute at idle typically indicate internal injector wear, but exact thresholds depend on OEM specifications for each engine.
Ensure all test conditions—fuel temperature, rail pressure, and timing—are carefully controlled to avoid misleading results during the 60-second measurement window.
Proper sealing and matching fittings are crucial to prevent air ingress and ensure accurate measurements, especially on Power Stroke return lines that are prone to cracking.
Repeat tests and verify uniform conditions across cylinders to detect intermittent leaks and avoid false positives from setup errors.
When results are borderline or inconsistent, bench testing is recommended over on-vehicle measurements before committing to injector replacement.
Why Return Flow Matters and What OEM Reference Values Say
Every common-rail injector bleeds off a small amount of fuel by design. That flow lubricates and cools the control valve, then routes back to the tank through the return line. The problem starts when the control valve seat wears, the armature sticks, or internal seals degrade. Once that happens, fuel that should go through the injector’s spray tip escapes through the return path instead, and the return flow diagnostics reference confirms elevated return volume is a direct signal of internal wear and leakage.
Reference range snapshot: Bosch CRI 2.x solenoid injectors typically run 12 to 22 mL per minute at idle, with most shops flagging anything above 30 mL/min as a warning-level reading. Bosch CRI 3.x piezo injectors generally have lower return flows at idle, and readings exceeding typical thresholds may indicate increasing wear. Denso and Delphi injector families track similar ranges, though the exact number shifts with engine displacement, rail pressure calibration, and idle speed.
Treat every one of these numbers as workshop guidance, not gospel. The only number that truly matters is the one printed in your engine’s own service manual, because OEM procedures like this Cummins 6.7L test sequence specify exact RPM, rail pressure, and pass/fail volumes for that specific application.
Why not just pull ECM balance rates and call it done? Balance rates estimate injector performance by comparing the correction the computer applies to each cylinder to hold target RPM. That works well for catching a badly clogged tip, but a control valve leaking internally can still deliver close to the correct fuel charge while dumping extra volume out the return side. The balance rate looks fine. The physical leak keeps growing. That’s the gap a return flow test closes, and it’s also why a scan tool reporting no codes doesn’t mean the injectors are healthy.
What Test Kit and Tools Do You Actually Need?
A return flow test is only as good as the hardware collecting the fuel. Loose fittings, mismatched adapters, or a container that isn’t graduated in fine enough increments will hand you numbers you can’t trust.
Core kit components:
-
A 4 or 6 channel graduated collection kit, sized to match your cylinder count, so you’re reading all injectors under identical conditions at once
-
Return-line adapters matched to your injector family, since Bosch, Denso, and Delphi fittings are not interchangeable
-
Sealing plugs to cap the factory return line while your test lines are connected
-
An infrared thermometer to confirm fuel and engine temperature before you trust a reading
-
A scan tool or tachometer to hold and verify RPM through the test
-
A stopwatch or a timer function on your scan tool for exact 60-second collection windows
-
Nitrile gloves, eye protection, and a spill tray or drain pan rated for diesel fuel
Single-channel setups work for spot-checking one suspect cylinder, but a graduated multi-channel kit is worth the investment if you’re doing this more than once. Reading all injectors in the same 60-second window removes RPM drift and rail pressure fluctuation as variables between cylinders.
Route every overflow hose downhill and back into a sealed container tied into the return path, never open to atmosphere. An open overflow invites air into the low-pressure side of the fuel system, and that air shows up later as a rough idle that looks like a new injector problem.
Pro Tip: Before you connect anything, dry-fit every adapter by hand first. A return-line fitting that needs force to seat is either the wrong size or already damaged, and forcing it on a worn 6.7L Power Stroke return line often finishes the job of breaking it.
How Do You Perform an Injector Return Rate Test Step by Step?
Getting a clean result comes down to controlling three variables: fuel temperature, rail pressure, and time. Skip any one of them and you’ll spend more time second-guessing the data than you saved by testing in the first place.
Before you start
Warm the engine to normal operating temperature, generally 180 to 200 degrees Fahrenheit depending on the application, and let it idle for a few minutes once it gets there. Fuel temperature swings the results more than most techs expect: colder fuel is thicker and returns less volume, so a “good” reading on a cold engine can mask a real problem. Pull up your scan tool and confirm actual rail pressure matches the commanded value before you touch a single fitting. If the two don’t match, fix that first. A return flow test run against an unstable rail pressure target isn’t measuring the injectors at all.
Setup
-
Shut the engine off and relieve system pressure per your service manual before disconnecting anything.
-
Label each return line by cylinder number before removing it. This sounds obvious until you’re staring at six identical hoses ten minutes in.
-
Cap the factory return manifold or rail fitting with sealing plugs so the low-pressure system stays closed while your test hardware is connected.
-
Connect each graduated collection line to its matching cylinder, routing every hose downhill with no low points that could trap air.
-
Route the shared overflow line back into a sealed catch container, not the open shop floor.
-
Confirm every fitting is seated fully. A weeping connection at this stage will bleed off pressure and skew every number you collect.
Running the test
Start the engine and let it idle for 30 to 60 seconds before you start timing anything. This purge period clears trapped air and let flow rates stabilize at the collection lines. Once flow looks steady across all channels, start your stopwatch and collect for exactly 60 seconds at the RPM your service procedure specifies, commonly idle for a baseline check. The standard leak-back protocol calls for this same purge, stabilize, and fixed-duration collection sequence regardless of manufacturer, because timing consistency is what makes cylinder-to-cylinder comparison valid.
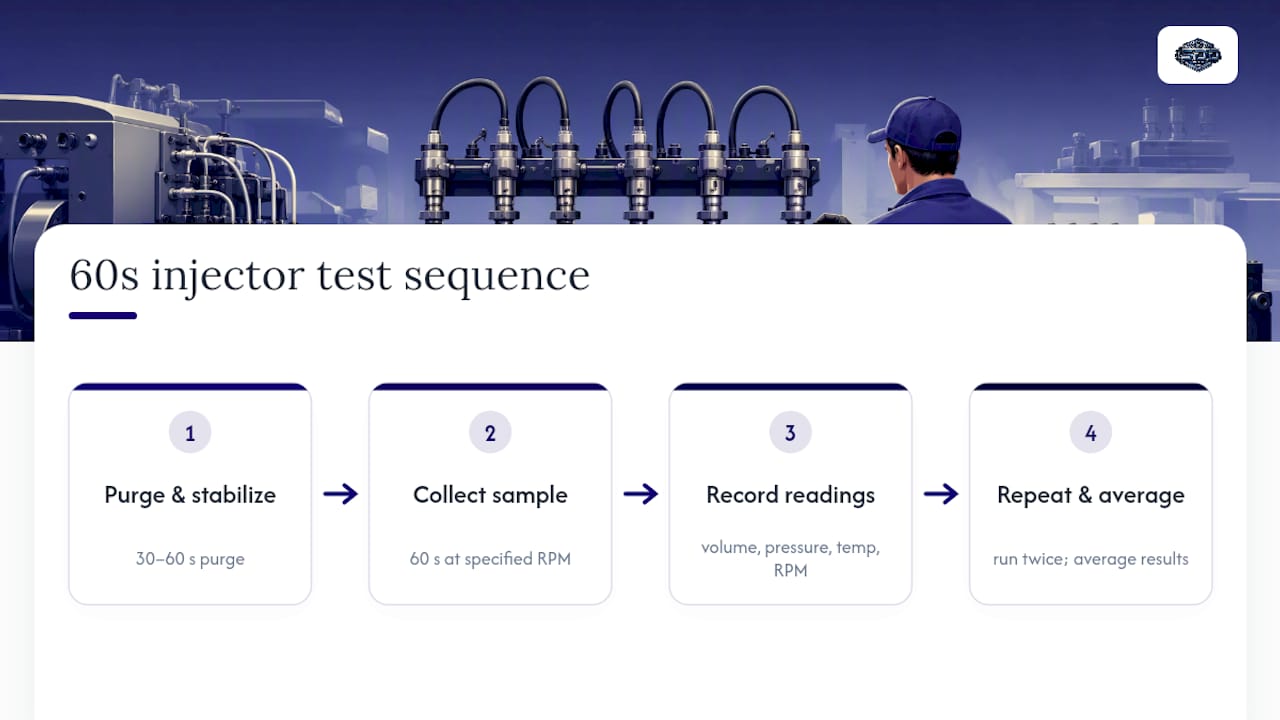
Record the volume in each graduated container the moment the 60 seconds ends. Note rail pressure, fuel temperature, and RPM alongside each reading, because a number without its test conditions is close to useless if you need to compare it against a re-test next week.
Run the test twice. A single 60-second window can miss an intermittently sticking control valve that only leaks under specific thermal or pressure conditions, and repeating the run and averaging results catches faults a one-shot test walks right past. If your baseline results sit close to the warning threshold, follow up with a higher RPM or light load test. Many control valve leaks worsen under load and stay borderline at idle.
Shutdown and reassembly
Shut the engine off, relieve pressure again, and disconnect the test lines in the reverse order you installed them. Inspect every factory fitting for damage before reconnecting; a cracked or brittle return line fitting on a Power Stroke is common enough after repeated disconnections that it’s worth a flashlight check every time. Reconnect the factory return lines, torque to spec, and run the engine briefly to check for leaks before you call the job done.
What Do the Test Results Actually Mean?
A single number in isolation tells you almost nothing. The pattern across cylinders is what turns a return flow test into a diagnosis.
-
One injector reading high, the rest normal: Points to a worn control valve or seat on that specific injector. This is the most common and most straightforward pattern to act on.
-
Two adjacent cylinders reading high: Suggests a restriction in a shared high-pressure fuel pipe rather than two coincidentally failing injectors.
-
All injectors reading high together: Points away from the injectors entirely and toward the rail pressure control system, the pressure control valve, or the fuel rail itself.
-
Near-zero flow on one or more cylinders: Suggests a blocked return line or a control valve stuck closed, not a healthy injector.
-
Inconsistent readings between test runs: Often means a control valve that sticks intermittently, which is exactly why running the test twice matters.
Once you’ve identified a pattern, the severity of the number decides your next move. At that point you’re not preserving a marginal part, you’re delaying an inevitable failure.
Before you condemn an injector on borderline numbers, rule out the usual confounders: confirm rail pressure held steady through the test, verify fuel temperature matched your baseline run, and check that every return hose sealed properly with no weeping connections. A return flow test that looks bad because of a leaking hose fitting will send you chasing the wrong part.
For a truly borderline injector, or when you need to spray pattern and dynamic leak-down data the on-vehicle test can’t provide, a calibrated test bench remains the definitive diagnostic tool. Bench testing confirms exactly what the on-vehicle numbers only suggest, and it’s the right call before you invest in a full injector replacement based on a single ambiguous reading.
Common Mistakes That Ruin an Otherwise Good Test
Most bad return flow readings trace back to test setup, not the injectors themselves. Air ingress is the biggest offender: an open overflow line or a poorly seated adapter lets air into the low-pressure system, and trapped air reads as erratic flow that has nothing to do with injector condition. Seal every connection, route hoses downhill, and confirm flow looks steady during your purge period before you start timing.
Fuel temperature is the second-biggest source of bad data. Cold fuel is thicker and returns noticeably less volume, and warmer fuel or higher altitude can push return volumes 10 to 15% above baseline even on a healthy injector, according to the return flow technical reference. Always log fuel temperature with every reading so you’re comparing apples to apples on a re-test.
-
Check every return hose for kinks or partial blockages before you trust a low reading; a pinched hose looks exactly like a healthy injector until you straighten it out.
-
Never rely on a single 60-second run for a diagnosis you’re about to act on financially.
-
If a reading sits right at the warning threshold, add a higher-RPM or light-load pass rather than guessing.
-
Log every test condition, RPM, rail pressure, and fuel temperature, so a follow-up test six months from now means something.
Pro Tip: Sealing the factory return line properly does more than prevent air ingress during the test itself. A loose seal left in place after reassembly is a common cause of a rough idle showing up days after a return flow test, even when the injectors themselves were never the problem.
Who’s Behind This Guide
This guide comes from Standard Diesel Direct in collaboration with it’s sister company, Standard Diesel & Repair, where the team spends more time under trucks than behind a keyboard. Standard Diesel Direct is a parts supplier operating from a fully equipped shop where components are installed and tested before being offered to customers, providing a hands-on approach different from writing about parts secondhand.
-
Return flow testing on the vehicle is a reliable screening tool, not a final verdict. It tells you which injector to suspect, not always the exact internal failure.
-
Borderline or contradictory readings deserve a trip to a calibrated test bench before you commit to replacement.
-
For deeper background on how wear starts in the first place, see how injector failure typically develops and what steps slow it down.
-
When a return flow test confirms replacement is the right call, the full injector install process walks through removal and reinstall in detail.
Parts That Make Testing and Repair Faster
Standard Diesel Direct stocks the fittings that turn a return flow test from a wrestling match into a clean 20-minute setup.
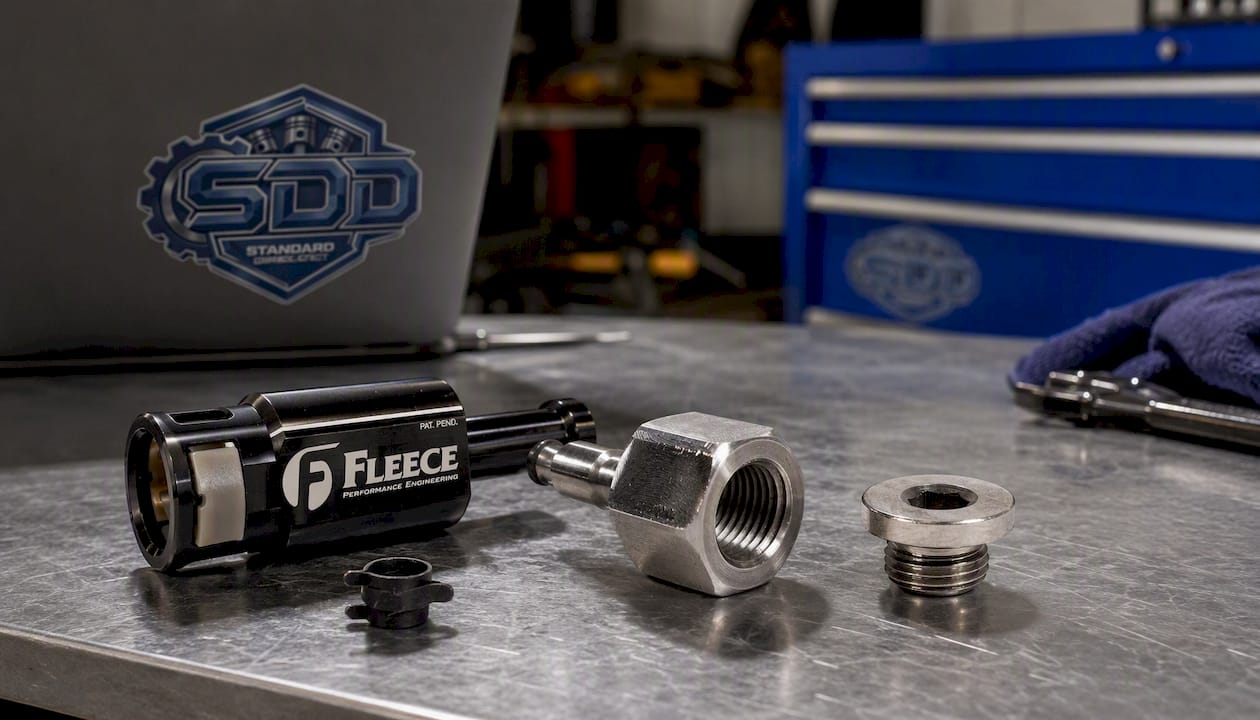
If you’re running an LML Duramax, the biggest hurdle to a clean test is usually access. The Return Fuel Pressure Test Port for 2011 to 2016 LML Duramax gives you a dedicated, sealed connection point instead of forcing you to adapt around a factory fitting that was never designed for repeated test hookups.
On the Power Stroke side, return line fittings take a beating from repeated disconnection during diagnostic work, and they’re brittle enough on a 6.7L that cracking one mid-test is common. The Injector Return Line Repair Fitting for 2011 to 2016 6.7L Power Stroke replaces a single damaged connection without tearing into the whole return manifold, and the 5-pack version makes sense if you’re running return flow tests regularly or servicing more than one truck.
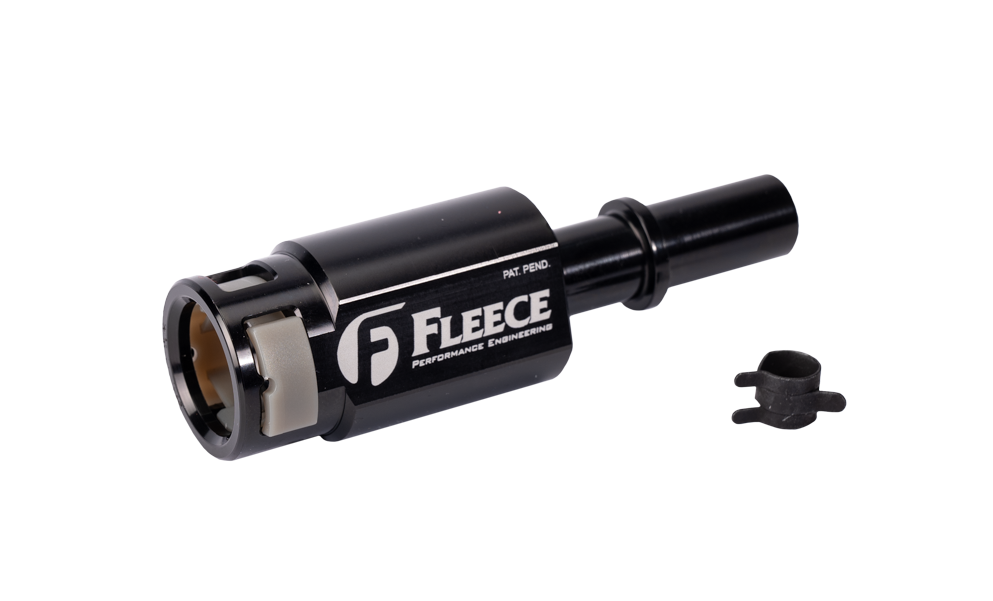
Standard Diesel Direct’s parts get chosen and tested by technicians who install this hardware in their own shop, not just described from a spec sheet. That’s the same standard whether you’re shopping Ford, GM, or RAM fuel system parts, and it carries over to the UTV, Can-Am, and Polaris lineups for side by side owners doing their own fuel system diagnostics. Check the fitment guide on each product page against your VIN and model year before you order, then get the right port or fitting in hand before your next test session.
Where to Verify Exact Specs
Reference values in this guide are consolidated workshop figures. Your exact pass/fail numbers live in manufacturer documentation.
-
Diesel Injector Return Flow Diagnostics: A Complete Technical Reference covers consolidated reference ranges and the case for bench testing on ambiguous results.
-
Injector Leak-Back Test Method & Pass Limits details the step-by-step collection protocol used across most shops.
-
The Cummins 6.7L Operation CHARM service manual excerpt shows exactly how a manufacturer specifies RPM, rail pressure, and volume limits for one specific application. If you’re chasing whether a test is insufficient for your situation, this guide on when on-vehicle checks fall short offers useful context on the limits of field diagnostics versus shop equipment.
Sources
FAQ
How Do I Perform an Injector Return Flow Test?
Warm the engine to operating temperature, confirm rail pressure matches the commanded value, then disconnect each injector’s return line and route it into a labeled, graduated container. Purge for 30 to 60 seconds, collect for exactly 60 seconds at the specified RPM, record each volume, and repeat the run to confirm the results.
What Should My Injector Balance Rate Be At?
Balance rate targets vary by engine and are set in the manufacturer’s service procedure, typically expressed as a narrow correction range around zero. A balance rate within spec doesn’t rule out an internal leak, which is exactly why a physical return flow test catches problems balance rate alone can miss.
How Do I Test the Injector Return Flow Rate on a 5.9 Cummins?
The procedure follows the same core steps: warm the engine, verify rail pressure, disconnect and cap the return lines, collect volume per cylinder for 60 seconds at the specified idle speed, and compare results against the pass/fail limits in the Cummins service manual for that exact model year.
What Should the Injector Flow Rate Be?
There’s no single universal number. Bosch CRI 2.x solenoid injectors commonly run 12 to 22 mL per minute at idle, CRI 3.x piezo injectors run closer to 8 to 15 mL/min, and the only figure you should treat as final is the one listed in your engine’s own OEM service manual.
When Should I Send an Injector to a Test Bench Instead of Relying on This Test?
Send it to a bench when on-vehicle results are borderline, inconsistent between runs, or when you need spray pattern and delivery data that a return flow test can’t provide. Bench testing remains the definitive check for a diagnosis you’re about to act on financially.